- দ্বারা WFsensors
Measuring depth on a lifejacket faces challenges from unstable immersion conditions: the device will move through the air–water interface repeatedly, face saltwater corrosion, shocks and rapid motion. To get accurate lifejacket depth measurement, pick an appropriate housed pressure sensor, optimise mounting position and sealing, stabilise the signal chain, and apply real-time temperature compensation and calibration.
ক্যাটালগ
1. Installation prep: waterproof sealing and sensor selection
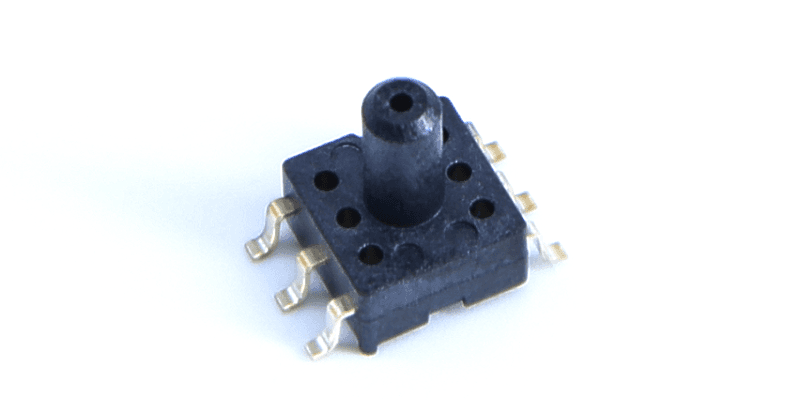
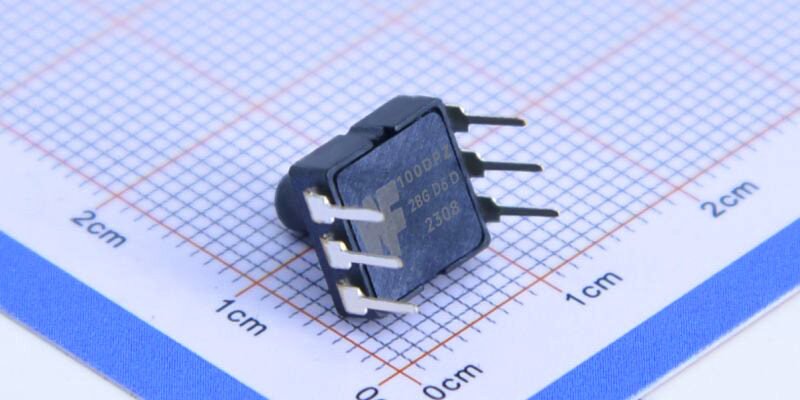
Before you start the mechanical work, be clear about the use case: maximum depth to measure, target accuracy (for example, ±2 cm), response speed and operating temperature range. Housed devices (like the WF5808F family shown) usually use compact digital MEMS elements, with an exposed pressure port, LGA pads and metal or polymer housing. When choosing a sensor, prioritise saltwater resistance, low long-term drift and integrated temperature sensing.
Sensor enclosure types and lifetime assessment
When selecting a sensor, check diaphragm material, housing finish and the protection level of electrical interfaces. Prefer units with corrosion-resistant diaphragms and protective coatings, and review drift and lifetime test data. Digital sensors simplify connection to a lifejacket microcontroller and cut out analogue amplifier drift. Physical size and mass matter too: lighter sensors respond faster and have less impact on buoyancy.
")
2. Mechanical layout: cable strain relief and mounting location
Pick a mounting spot that meets two needs: it must wet reliably when the wearer is submerged, and it should avoid repeated damage from waves or abrasion when not submerged. A good location is along the lower edge or in a side cavity of the lifejacket, inside a low-profile housing with the pressure port facing out and a small hole to the water. Use a mechanical clip plus a soft gasket to avoid concentrating stress at solder pads.
Pressure port orientation and damping
To get stable readings, include mechanical damping and a small internal fluid cavity so the sensor reacts quickly but isn’t overly sensitive to short spikes. Use a short flow tube and a fine porous filter to slow fluid ingress and prevent trapped air bubbles. Design mounting parts to relieve stress, and add a cable breakaway or strain relief so rescue movements don’t pull the sensor.
3. Protection and sealing: surface coatings and insert interface design
The housing must keep electronics dry and resist corrosion while still allowing pressure transmission. A common method is to place the sensor inside a dedicated housing with a small water-facing channel at the pressure port; that channel can include a hydrophobic porous element or replaceable filter to stop contaminants. Keep electronics out of direct seawater exposure — put them in a sealed compartment and use sealed connectors or conformal coatings for extra protection.
Handling water/air transitions and anti-backflow features
Lifejackets see frequent water–air transitions, so avoid designs that trap bubbles at the port. The channel and filter geometry should let the sensor return to correct readings quickly after surfacing. Built-in or companion temperature sensing is used to correct for density changes, so depth readings stay consistent across temperature and salinity variations.
4. Signal and electronics: EMI control and data acquisition
Pick sensors with digital outputs (I²C, SPI or dedicated serial) to keep the system simple and avoid errors from analogue amplifiers. On a lifejacket, EMI can come from radios and switching supplies; keep signal lines short, use proper grounding and shielding where possible, and implement debouncing and digital filters in firmware.
Sampling rate, digital output and calibration
For lifejacket use, aim for a sampling rate around 10 Hz or higher to catch quick submersion and emergence events. Both factory calibration and simple field calibration are important: do a two-point check at known shallow and deep positions, log drift and apply linear or polynomial corrections in firmware. Pay attention to sensor start-up time (typically ~10 ms) and long-term drift, and design an auto-check routine.
5. Field commissioning: long-term reliability monitoring and maintenance
After installation, run system-level validation: dry/wet cycling, salt-spray testing, shock and vibration tests, plus long-term drift studies. Provide online diagnostics: use temperature, pressure change rates and reference checks to spot bad data or sensor failure. Log events and allow remote firmware updates to tweak filters and compensation.
Quick calibration, error source ID and verification
Make field calibration simple — for example, trigger calibration at a known depth or cross-check against a float or GPS-based reference. Identify error sources (air bubbles, loose mounts, cable faults or software offsets) and fix them specifically. Inspect filters, seals and cable joints regularly and replace wear parts to keep measurement accuracy stable.
উপসংহার
Integrating a housed pressure sensor into a lifejacket for accurate underwater depth measurement calls for a complete approach: sensor selection, mechanical mounting, protection and sealing, signal chain design, and field calibration and maintenance. With digital MEMS depth sensors featuring precision diaphragms and corrosion-resistant packaging, you can achieve reliable, fast depth readings suitable for rescue and monitoring scenarios. Key implementation points are: choose a saltwater-rated package, mount where the sensor reliably contacts the water with low mechanical stress, design the pressure channel to avoid trapped bubbles, use digital interfaces and temperature compensation, and implement quick calibration. Follow these steps and your lifejacket depth measurement will reach an engineering-useable, verifiable accuracy.
উপরের ভূমিকাটি শুধুমাত্র চাপ সেন্সর প্রযুক্তির প্রয়োগের পৃষ্ঠকে স্ক্র্যাচ করে। আমরা বিভিন্ন পণ্যে ব্যবহৃত বিভিন্ন ধরণের সেন্সর উপাদান, তারা কীভাবে কাজ করে এবং তাদের সুবিধা এবং অসুবিধাগুলি অন্বেষণ করতে থাকব। এখানে কি আলোচনা করা হয়েছে সে সম্পর্কে আপনি যদি আরও বিশদ জানতে চান, তাহলে আপনি এই নির্দেশিকায় পরে সংশ্লিষ্ট বিষয়বস্তু দেখতে পারেন। আপনি যদি সময়ের জন্য চাপ দেন তবে আপনি এই গাইডের বিশদ বিবরণ ডাউনলোড করতে এখানে ক্লিক করতে পারেন বায়ুচাপ সেন্সর পণ্য পিডিএফ ডেটা.
অন্যান্য সেন্সর প্রযুক্তি সম্পর্কে আরও তথ্যের জন্য, অনুগ্রহ করে আমাদের সেন্সর পৃষ্ঠা দেখুন.